Chocolate Linzer Tart
Schokolade Linzertorte
It's funny how saying goodbye to someone can give you cycling flashbacks on how your relationship evolved. That's what happened a few days ago when I said goodbye to one of my friends from medical school. I thought I'd be able to see her again, so I made this tart, which reminded me so much of the restaurant adventures we went through during our time as classmates. By now you will have inferred that I was making the tart to impress her (not a good idea then, that I made it for the first time-- but my culinary exploits have made me cocky). The fact that I was enamored with her was probably the one of the worst-kept secrets of my medical school life. You're probably wondering why I tried to keep it a secret at all. Yes, I know it sounds dumb. But at the time, I never actually thought I was good enough. The clincher is, even after years of personal growth and building my confidence, I still don't quite think I am. Certain people can really make you feel that way, as if you've never quite outgrown the first time you met-- when she thought you were incredibly haughty, a little weird, and (mistakenly) intimidatingly smart. The way your jaw dropped when you saw her perform onstage for the first time (and how it kept dropping every single time after that). When she introduced you to your first patisserie, when she gave you part of a cake she baked, and how you were tricked into a belated birthday surprise, which is how she saw you in boxer shorts with ducks all over it.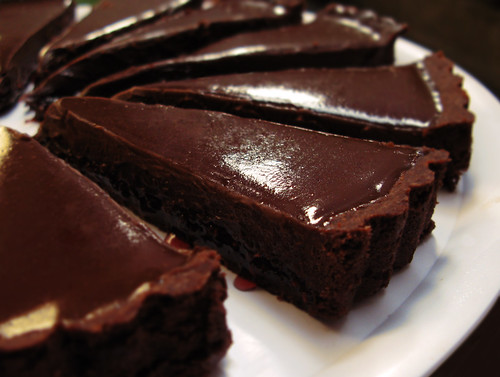
I know all that sounds idealized and misty-water-colored, but if I wanted to, I could remember everything bad that happened between us. But for now, it's time to say goodbye: the ship has sailed. It's a new life ahead of me, and a new year. Maybe I learned a lesson and from now on will say exactly what I mean without fear of ridicule (probably won't, for fear of getting a massive heart attack). The silly thing is, she might be reading this (if she doesn't know any of it already, that's pretty strong denial for you). Anyway, the people you meet in your life are worth more than the lessons you've learned from them. After all, having friends who care about you is not a very bad thing indeed.
Chocolate Linzer Tart (adapted from Chocolate Desserts by Pierre Hermé)
In a food processor or mixer, process the butter until creamy, scraping down the sides as needed. Add the confectioner's sugar, cocoa, egg yolk, cinnamon, salt, and rum and process until smooth, scraping the bowl as needed. In a sifter, combine the flour and baking powder and sift it into the mixture. Pulse (or continue mixing) until thoroughly blended. The dough will be very soft. Scrape onto a piece of cling film and gather it into a ball and press into a disk. Let it chill for at least 4 hours or up to 2 days (alternatively you can freeze it for a month).
Grease a 8-3/4 inch (22cm) tart pan with a removable bottom (the sides are ideally 3/4 inch high). Roll out the dough to a thickness of a scant 1/4 inch (7mm). Since the dough becomes very soft quickly as it warms to room temperature (and quicker still once you've started rolling it), I recommend rolling in between two sheets of parchment paper/ cling film, cutting the giant disk into quarters, laying the quarters out on the tart pan, and pressing the cut edges together. The dough is very forgiving. You can also pat the dough into the tart pan without rolling, but keep in mind the thickness should be even throughout. Roll over the top of the tart pan with a rolling pin to make the edges neat. The excess dough can be shaped into a log, cut into circles, and baked as cookies.
Cover the prepared crust with aluminum foil and fill the foil with dried beans or rice. Chill for at least 30 minutes. Preheat the oven to 350°F (177°C). Bake the pastry for 18-20 minutes, then remove the foil and beans and bake for 3-5 minutes more, until firm. Cool to room temperature.
Make sure the jam is not too runny. If it is, microwave or boil in a saucepan for a few minutes until it thickens sufficiently. Take note that it will thicken further as it cools. Sprinkle the gelatin over the jam and stir it in. Microwave on HIGH for 15 seconds or set over very low heat, stirring until the gelatin is dissolved. Let the jam cool for a minute and spread it in an even layer over the bottom of the crust. Set aside in the refrigerator.
Chop the chocolate finely and place in a medium bowl. Bring the cream to a boil in the microwave or in a heavy-bottomed small saucepan, then pour over the chocolate quickly, but trying not to create bubbles as you dump it in. Using a rubber spatula, gently stir in a widening concentric circle from the center, being careful not to produce any bubbles as you stir; be patient as eventually the heat of the cream will melt all the chocolate. Let the ganache sit for a minute and cool while you work the butter in a separate bowl until very creamy. Add the butter in two additions, stirring gently as before. Let the ganache cool until it is just slightly warm to the touch but still pourable. Pour it over the jam just until it reaches the top of the crust. Refrigerate until set. Let sit at room temperature for 30 minutes before serving.
Homemade Raspberry Jam
Put the berries in the workbowl of a food processor and process, turning off the machine for a while if it gets too hot, processing it for a total of 5 minutes. Transfer to a heavy-bottomed casserole and stir in the sugar. Bring to a rollicking boil, stirring occasionally, and boil for 10-15 minutes until the jam thickens slightly and the bubbles look clear. Stir in a teaspoon of the lemon juice and scrape the jam into a heatproof jar. The jam can be kept in the refrigerator for about 1 month.